PianoPiano
Itemitem
-
Piano
Recording model CPS-PF1R
-
Piano
SR model CPS-PF1S
-
Piano
Tone Plug model CPS-PF1P
-
Piano
Contact Chip P
-
Piano
Base Set
-
Piano
Gauge PF
-
Piano
Tone Plug REC for CPS-PF1P
-
Piano
Tone Plug SR for CPS-PF1P
-
Piano
Output Cable REC for CPS-PF1R
-
Piano
Output Cable SR for CPS-PF1S
-
Piano
Output Cable Direct for CPS-PF1P
YAMAHIKO Piano PickupPiano
High Quality Piano Pickup System For Professional Use
With it’s natural sound and ease of installation, the YAMAHIKO piano pickup is becoming the system of choice of for sound reinforcement world wide, with users in over ten countries.

- High selectivity on music sound vibration without taking other noises
- Stable positioning realizes high fidelity sound for long time
- Easy to set on/off in short time
- Very seldom to damage the musical instrument by the setting of the pick-up
- No need to use adhesive tape in between
- No spot or scratch on the surface after setting it off
- Able to set both on grand and upright pianos
- Force mode pick-up system(FMPS) realizes high fidelity and high S/N
- Stereo-like sound expected when using several pick-ups simultaneously
- Low noise because of complete-shielded structure
- No noise due to self-vibration-preventing construction in the connecting part of the pick-up body and the cable cords
Sample sound
-
SR (Sound Reinforcement) model
-
Recording model
Demonstration of leakage from environment sound.
This sound recorded at very narrow stage of small Jazz club in Yokohama. (with recording model CPS-PF1R)
-
Total mixed sound
-
Sound of piano track
These sample sound are recorded directly with DAT recorder through BOSS DI-1Direct box. Low side pickup sound assigned Lch and high side pickup sound assigned Rch. Please check each channel for each pickup sound.
The pickups installed like this picture for these sample sounds.
(It is necessary to order two pickups for this setting. This pickup is sold one by one. We do not selling pair sets.)

The new concept of Force Mode Pick-up System (FMPS)
Many pianists are facing the problem that their performances become difficult since they can hardly listen to their own piano sound in loud sound ensemble such as with electric instruments. It is very hard for them to solve this problem by themselves because an ordinary microphone would likely cause another problem like howling. The existing pick-up systems for piano in the market are very useful with its less howling margin and capabilities of amplifying without over-dominating sound around the piano. But still many products might have the following unsolved problems:
- Unnatural reproduction of sound tones compared with those via microphone
- Unstable sound for long time use
- Spot or scratch would remain on the surface after removed
- The piano owner, afraid of spot/scratch trouble would possibly refuse to utilize it
- Out of order after a number of uses
By introducing the new concept of Force Mode Pick-up System (FMPS), we have succeeded to develop the new pick-up system without the above troubles even in the frequent uses by the professional pianists. It would promise that they could obtain ideal self-monitoring environment when they use our compact pick-up system. It can be easily set in the piano by the players themselves in short time without damaging the instrument if carefully set as explained in the next clauses.
Adoption of FMPS
Many of existing piano pick-up systems collects the vibration of the piano from the parts in full sound vibration which will be then output as the electric signal. On the contrary, our pick-up takes the vibration of the piano from the soundboard and least-vibrating parts e.g. brace and backpost. It changes the force arose between soundboard and brace/backpost into electric signals, which reproduce very natural and stable sound. Some sound modification by equalizer and reverberator would probably make even higher quality of sound than that via microphone.
Sound variations and stereo effects
Simultaneous setup of more than 2 pick-ups is possible since they can be positioned anywhere between soundboard and brace/backpost, by which you can obtain stereo-like sound or several sound variations depending on the setup positions. Even 2-3 pick-ups enable you to obtain the well-balanced stereo sound through the wide range of piano notes.
About the construction of a piano instrument
Before we go into the detailed explanation of our piano contact pick-up system (hereafter call it“the pick-up”), some knowledge on the piano construction would be indispensable, though the names (how to call them) of each part might be more or less different among piano manufacturers.
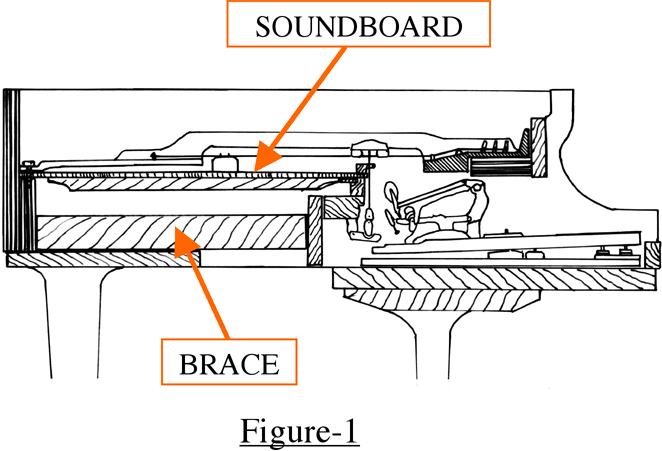
The following figure shows you the side view of a grand piano.
The pick-up is to be placed between soundboard and brace, which please bear in mind referring the figure-1 below:
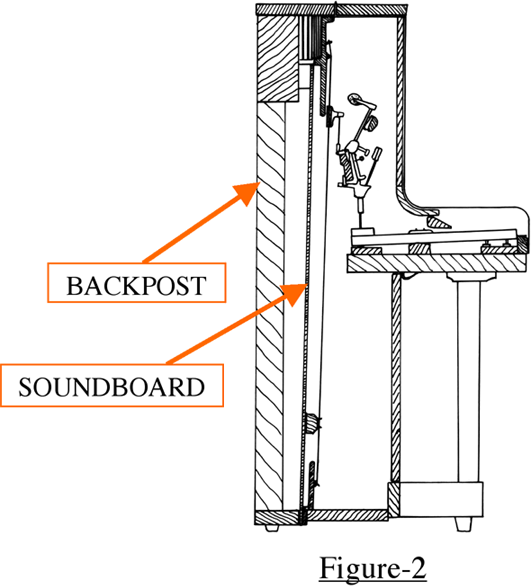
Next, here we show the side view of an upright piano. The pick-up is to be placed between soundboard and backpost.(see figure-2)
Explanations of mechanismMechanism
The pick-up can be set both on grand and upright piano, between the soundboard and brace (grand) or backpost (upright).
The pick-up consists of the following parts:
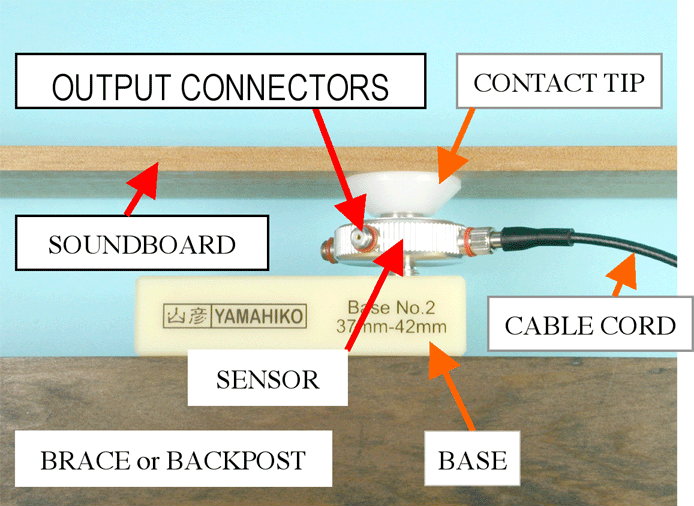
- Contact tip (on the soundboard)
- Sensor (exchanging the vibration into electric signals)
- Base (to support sensor)
- Cable cord (to transmit the electric signals with high fidelity)
Contact tip
This is like a half of globe that has small half-globe hollow in lower part connecting the upper part of the sensor part. It promises its thorough touch on the soundboard in any angles without scratching it, as well as maximum transmission of the vibration into the sensor part. The contact tip has a magnet inside that always keeps itself on the sensor part during the set-up operation.
Sensor
This exchanges the vibration coming through the contact tip, into electric signals with high fidelity. In every 90 degrees angle, it has the output connectors, so that you can select the most convenient one to put the cable cord during the set-up operation. The sensor is thoroughly shielded to be suffered from least magnetic effects.
Cable cord
This is well protected not to add any electric signals by the self-vibration on the original sound signals during the transmission to the amplifier. As mentioned above, it is easy to connect it to the sensor since you can put it on any convenient output connector of the sensor part.
Base
Five bases are prepared in different thickness so that you can select the most suitable one for the set-up space of your instrument.
InstallationInstall
Example of attachment position
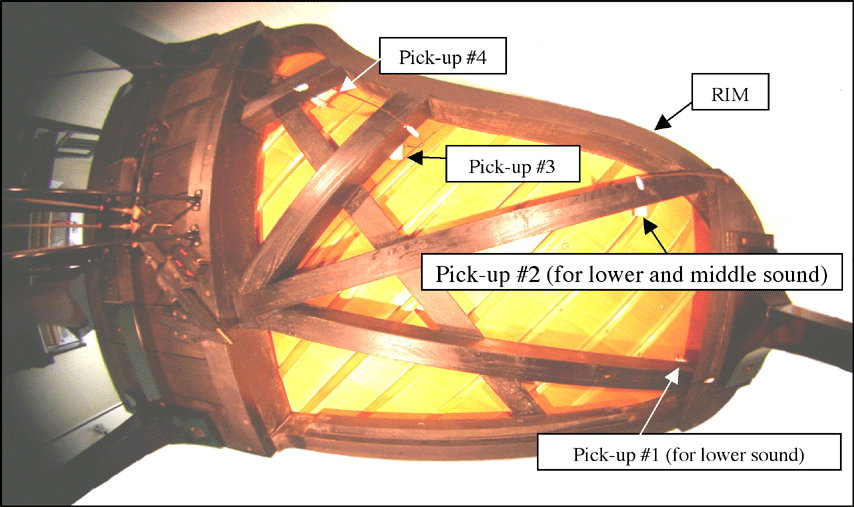
Set it in the places nearer to the limb of the soundboard to obtain natural sound.
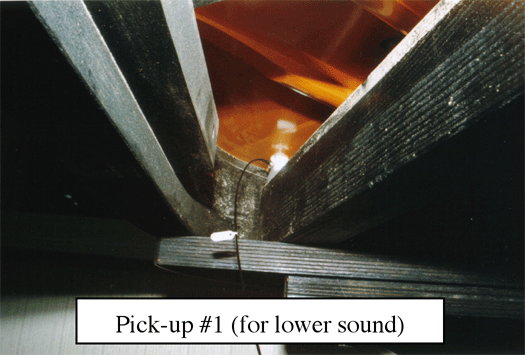
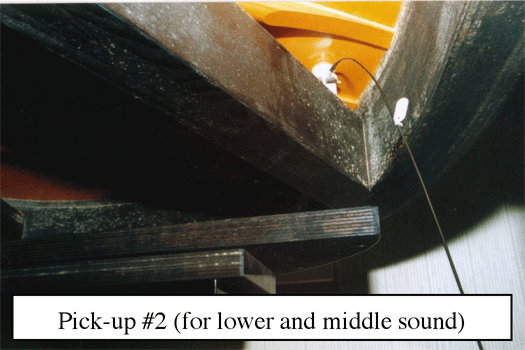
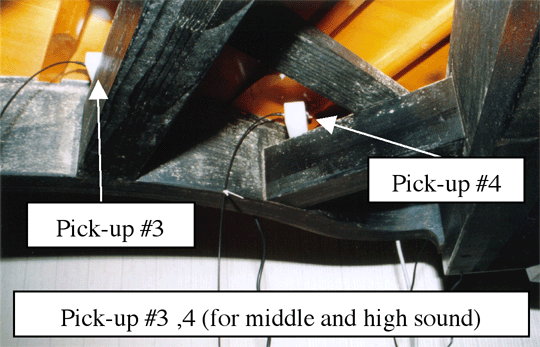
The following pictures show how to get the ideal sound outcome by using 4 pick-ups into Yamaha grand piano. Every pick-up was placed in 10cm distance from the Rim. Pick-up #2 and #4 were separated into stereo channel Light and Right respectively.
How to set Pickup in the Piano
These pictures show you how to set the pick-up into the soundboard and brace or backpost. (thesimple model for your clearer views on the operation)
-
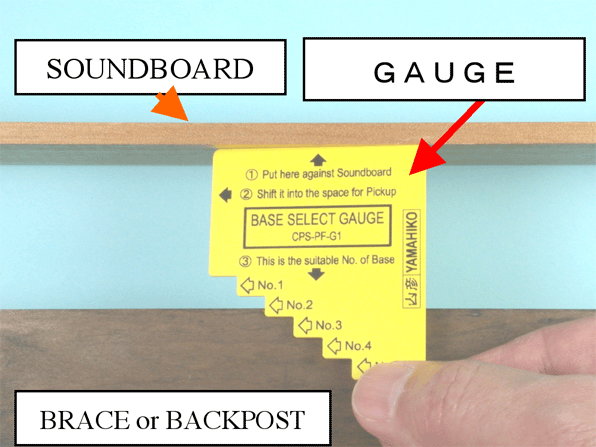
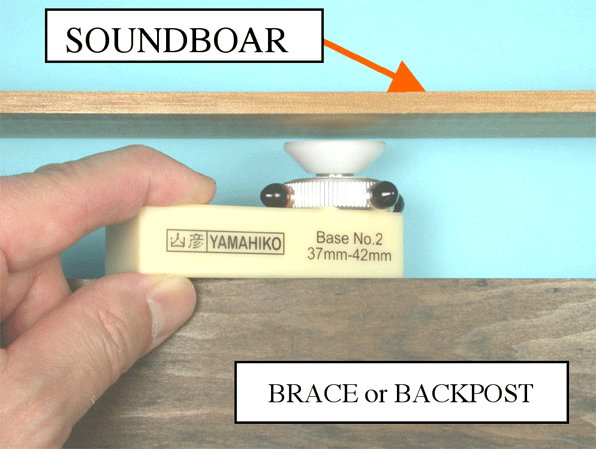
First of all, measure the space between soundboard and brace/backpost to select the base part with most suitable thickness. The yellow “base select gauge” will indicate the best fit base when you insert it between the sound board and brace or backpost.

-
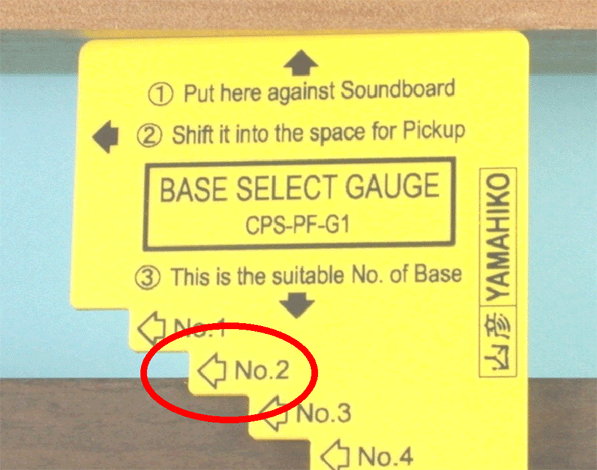
As shown in the left picture, the base select gauge will find the suitable No. of the base. In the left case, the gauge stops in No.2, the base with printed “No.2” will fit the instrument.

-
Then put the sensor into the selected base, screwing it into the hole of the base until the bottom part of the sensor touches on the surface of the base.
Do it carefully, otherwise you might break the screw.

-
And Contact tip is installed.
Now you are ready to go to the next step.
-
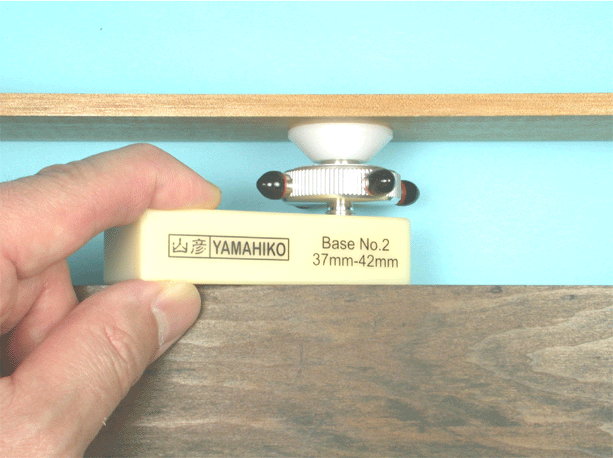
Then turn the sensor part left to pull it up until the contact tip lightly touches the soundboard and stop it.
Remember which output connector (any one out of four) faces in approximately best direction for cable connection.Do not remove the assembly when it touches the soundboard, otherwise you will scratch or damage the soundboard or brace/backpost.

-
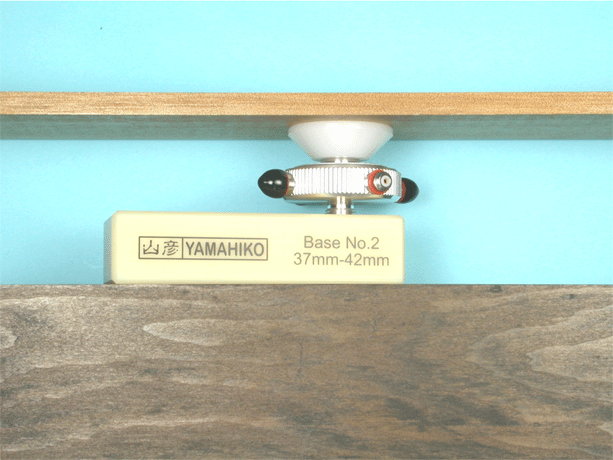
Turn the sensor left for more 90 degrees (remember that four output connectors are ready in every 90 degrees) to push up the contact tip onto the soundboard more tightly and stably.
In this operation some tension would be added on the soundboard, so that you should be very careful not to damage the soundboard by the pick-up whether by too much turning (=pushing up or forth) or by removing it when it touches on any of the surfaces of the instrument.

-
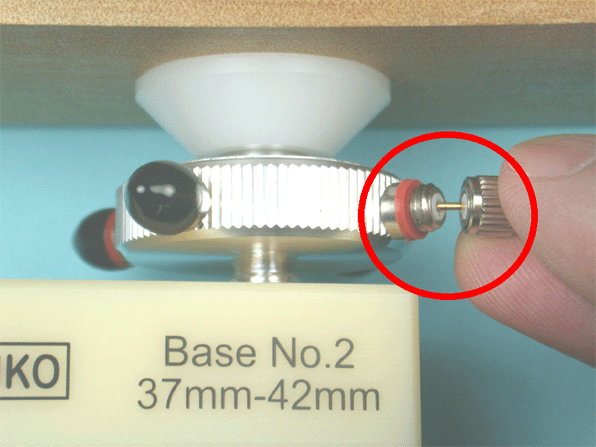
The dust protection cap of the output connector at the position where the output cable is connected easily is removed.

-
Then connect the cable cord into the sensor. Insert the center pin of the cable cord into the center hole of the output connector.

-
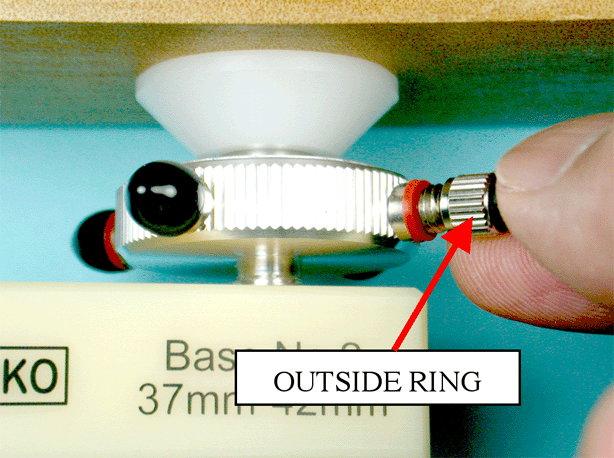
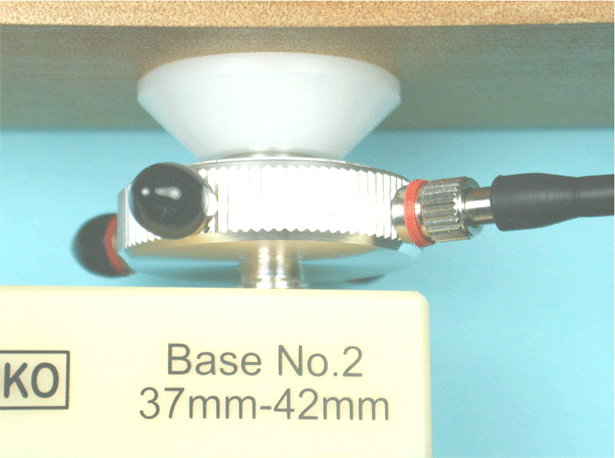
Screw the outside ring of the cable cord to fix it to the output connector of the sensor.

-
All operation has been completed and now you are ready to use it.

SpecificationSpec
Electrical Specification
Unbalanced output Recommend to use high input impedance direct box. (ex.COUNTRYMAN TYPE85,BOSS DI-1)
Sensor frequency response: 20Hz to 10KHz ±3dB (10M ohm terminated)
Maximum output voltage: 2Vp-p
Output cable cord
length: 2m (around 6.5ft) output
plug: 1/4″ Phone plug


